MENU
|
Getting Started:
FAQ | Forum
Customizing K2PDFOPT:
Adjusting the output:
Processing Options:
|
|
| |
AUTO-STRAIGHTENING
Here we have an example where I intentionally skewed the scanned pages of a book
to demonstrate the auto-straightening option (-as) with k2pdfopt. This example needs more
than just auto-straightening, though, it also needs the -m option
(see ignoring borders) and the -col option to force
only two columns to be detected, otherwise the wide spacing of the words fools k2pdfopt
into thinking there are sub-columns in some places. Note that the page is so tilted that
I couldn't just put -as, since it defaults to a max of 4 degrees of correction.
I had to specify up to 5 degrees of correction (-as 5).

Original File |
|
Default Conversion --
the page is too tilted, so
k2pdfopt can't isolate any
columns or rows of text.
|
|
Using -as 5 -m 0.5 -col 2.
K2pdfopt now can isolate the columns. |
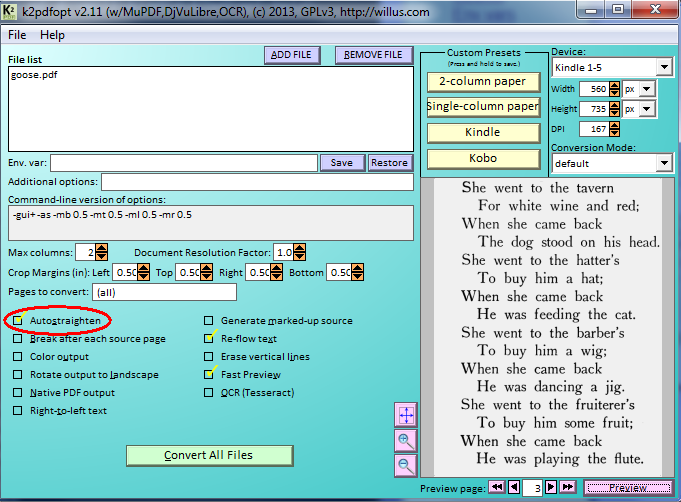
Window GUI auto-straighten checkbox |
In the text menu versions of k2pdfopt (OSX and Linux), you can also select (a) Auto-straighten from the k2pdfopt interactive settings menu.
|
|
|
|