MENU
|
Getting Started:
FAQ | Forum
Customizing K2PDFOPT:
Adjusting the output:
Processing Options:
|
|
| |
GETTING STARTED: MAC OSX
NOTE: An easy-to-install
OSX GUI has been contributed for k2pdfopt. It includes
k2pdfopt. You may wish to install k2pdfopt via this package. I do not provide support
for this package. Contact the author at his web site if you have questions.
NOTE 2: Several OSX 10.5 users have reported
that k2pdfopt for the mac does not run on their systems. I don't have an easy work-around
for this, so your options if this is happening to you are to upgrade to OSX 10.6 ($30
at Apple Store) or the latest OSX release
or to run the Windows version in a virtual Windows box.
K2PDFOPT DOWNLOAD AND RUN ON (SIERRA) OSX (VIDEO)
(In the part where I change the settings to allow the app to run, at about 1:35, you may get slightly
different options in the dialog box--the idea is to select the option that allows k2pdfopt to run.)
|
As of v1.22, I've been able to compile k2pdfopt for OSX 32-bit (Intel CPU only)
and OSX 64-bit (as of v1.28, Intel only).
If you don't know which one to download, choose the 32-bit version since it runs
on either 32-bit or 64-bit versions of OSX (again, Intel only).
The k2pdfopt download is
just a terminal shell application, so you have to install it a little differently
then you might be used to. Follow these instructions:
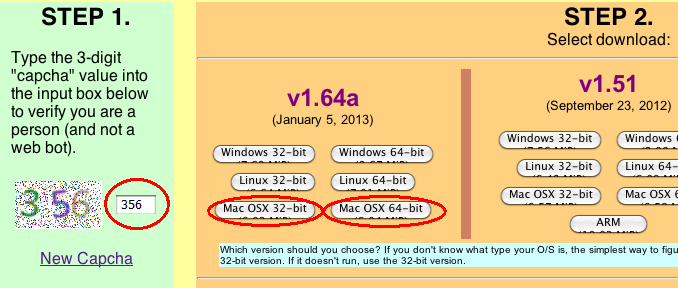
1. From the download page, (a) Fill in the capcha and (b) Click on one of the Mac OSX downloads.
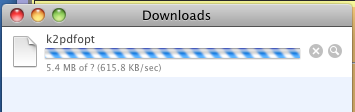
2. You should see Safari download the file...
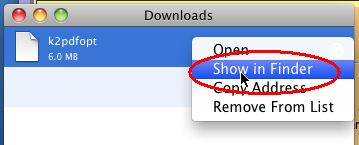
3. Right-click the download and select Show in Finder
4. Move (drag) k2pdfopt to your Desktop.
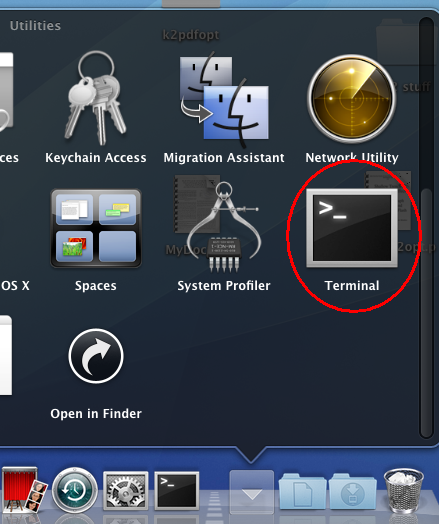
5. Launch the Mac terminal app. First open the utilities folder, which is
in the Applications folder.

Then open the Terminal app.
6. Type the three commands shown below in the terminal window:
a. cd Desktop
b. chmod 755 k2pdfopt
c. exit
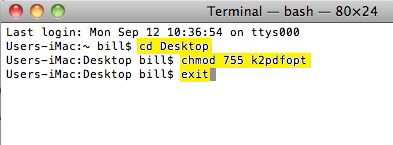
7. Close the terminal window after typing exit.
8. You should now be able to launch the k2pdfopt program.
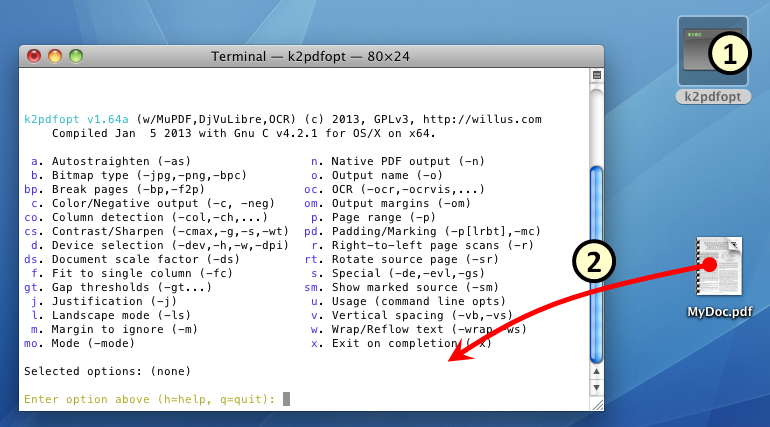
You cannot drag PDF files to the k2pdfopt icon,
so to convert a PDF file, (1) double-click
the k2pdfopt icon, and then (2) drag your PDF file to the k2pdfopt window, as shown
in the figure below.
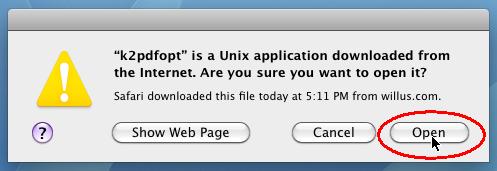
You may be asked if you are sure about opening k2pdfopt, as shown below. It's okay--
just click "Open".
Dragging the PDF file to the k2pdfopt window will cause the file name to be typed into the window.
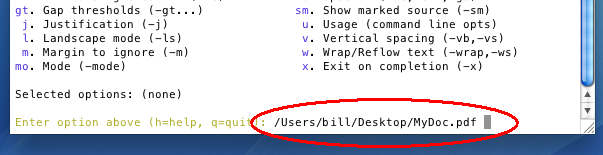
9. Press <Enter> after dragging the PDF file. That will set the file name.
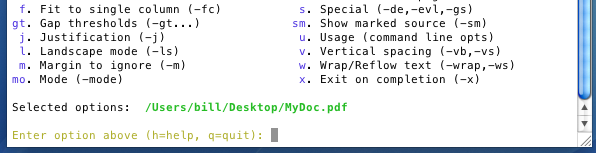
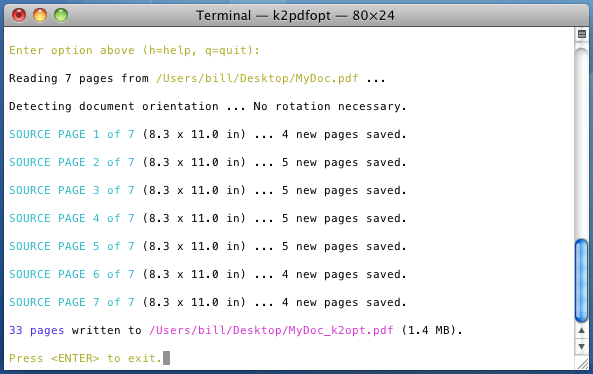
10. Finally, Press <Enter> again to start the conversion. After converting, your terminal window will look something like this:
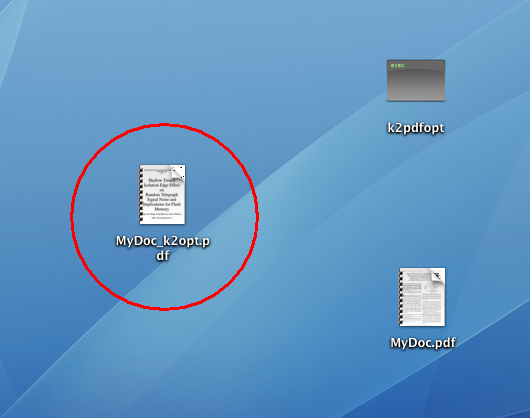
And then, after you close the k2pdfopt window, you'll see the converted file on the desktop.
CUSTOMIZING K2PDFOPT FOR THE MAC
If there are customized options that you want to select automatically, you can create a custom script:
a. Launch the terminal app (see Step 5.)
b. Type these commands (press <Enter> at the end of each line):
i. cd Desktop
ii. cat > k2pdfopt_custom
iii. cd Desktop
vi. ./k2pdfopt -ui -j 0 -odpi 250 $* (or whatever options you want--but be sure to put the -ui and keep the $* at the end)
v. (After pressing <Enter> for the line above, press <Ctrl-D> to close and save the file)
vi. chmod 755 k2pdfopt_custom
vii. exit
The customized script icon is now named k2pdfopt_custom, and the
-ui option is important so that the script will still ask you for a file name.
NOTE: If you move the customized icon to a new folder, you'll need to either move k2pdfopt with
it, or reference k2pdfopt by its full path name in the customized script (step iii above).
Another way to customize k2pdfopt is to use the K2PDFOPT environment variable.
|
|
|
|